iOS 8th Class
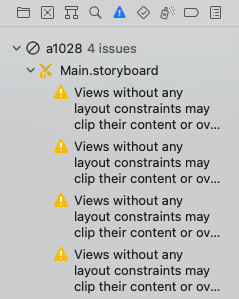
앱 실행시 나오는 이슈 네비게이터. 파일 탑색은 상단 첫번째 폴더 아이콘을 눌러 돌아 갈 수 있다.
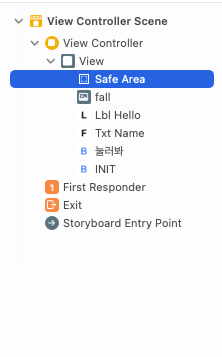
도큐먼트 아웃라인(문서 개략)
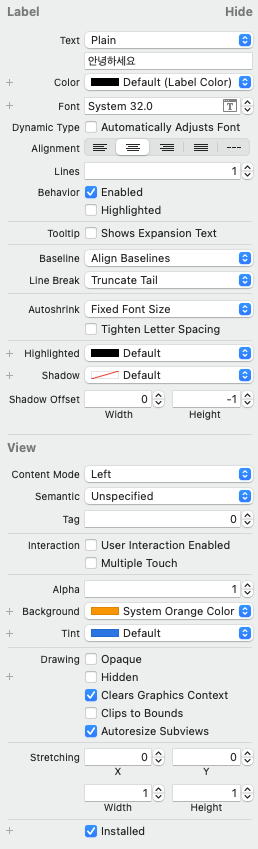
어트리뷰트 인스펙터(속성 탐색기)

| 구분 | SwiftUI | Storyboard (UIKit) |
|---|---|---|
| 등장 시기 | iOS 13 (2019년)부터 도입 | iOS 초기부터 존재 |
| UI 구성 방식 | 코드 기반 선언형(Declarative) UI | 시각적 편집기 기반 명령형(Imperative) UI |
| 레이아웃 방식 | VStack, HStack, ZStack 등으로 구조화 |
Auto Layout 제약조건(Constraints)으로 배치 |
| 미리보기(Preview) | 실시간 미리보기(Hot Reload 지원) | 시뮬레이터 또는 빌드 후 확인 필요 |
| 코드량 및 가독성 | 코드가 간결하고 구조적 | 코드와 스토리보드 파일이 분리되어 관리 복잡 |
| 상태 관리 | @State, @Binding, @ObservedObject 등 데이터 중심 |
Delegate, Notification 등 이벤트 중심 |
| 학습 난이도 | 초반에 선언형 패러다임 적응 필요 | UIKit 경험자에게 익숙하지만 코드 복잡 |
| 호환성 | iOS 13 이상에서만 완전 지원 | iOS 12 이하에서도 사용 가능 |
| 애니메이션 | 코드 몇 줄로 자연스러운 애니메이션 구현 가능 | 애니메이션 구현에 코드 추가 필요 |
| 협업 및 버전 관리 | 코드 기반이라 Git 충돌 적음 | XML 기반 스토리보드는 병합 충돌이 자주 발생 |
| 유연성 및 재사용성 | View 조합과 재사용이 용이 | 재사용 시 코드 연결 작업이 번거로움 |
| 프로토타이핑 속도 | 간단한 UI는 매우 빠름 | 시각적으로 직접 배치 가능하여 초보자에게 편리 |
| Apple의 방향성 | 차세대 표준으로 적극 권장 | 유지보수는 가능하지만 점차 비중 축소 중 |
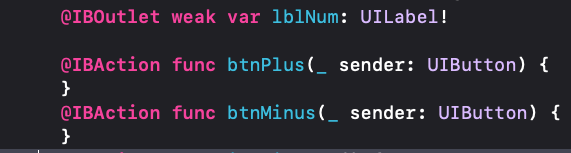
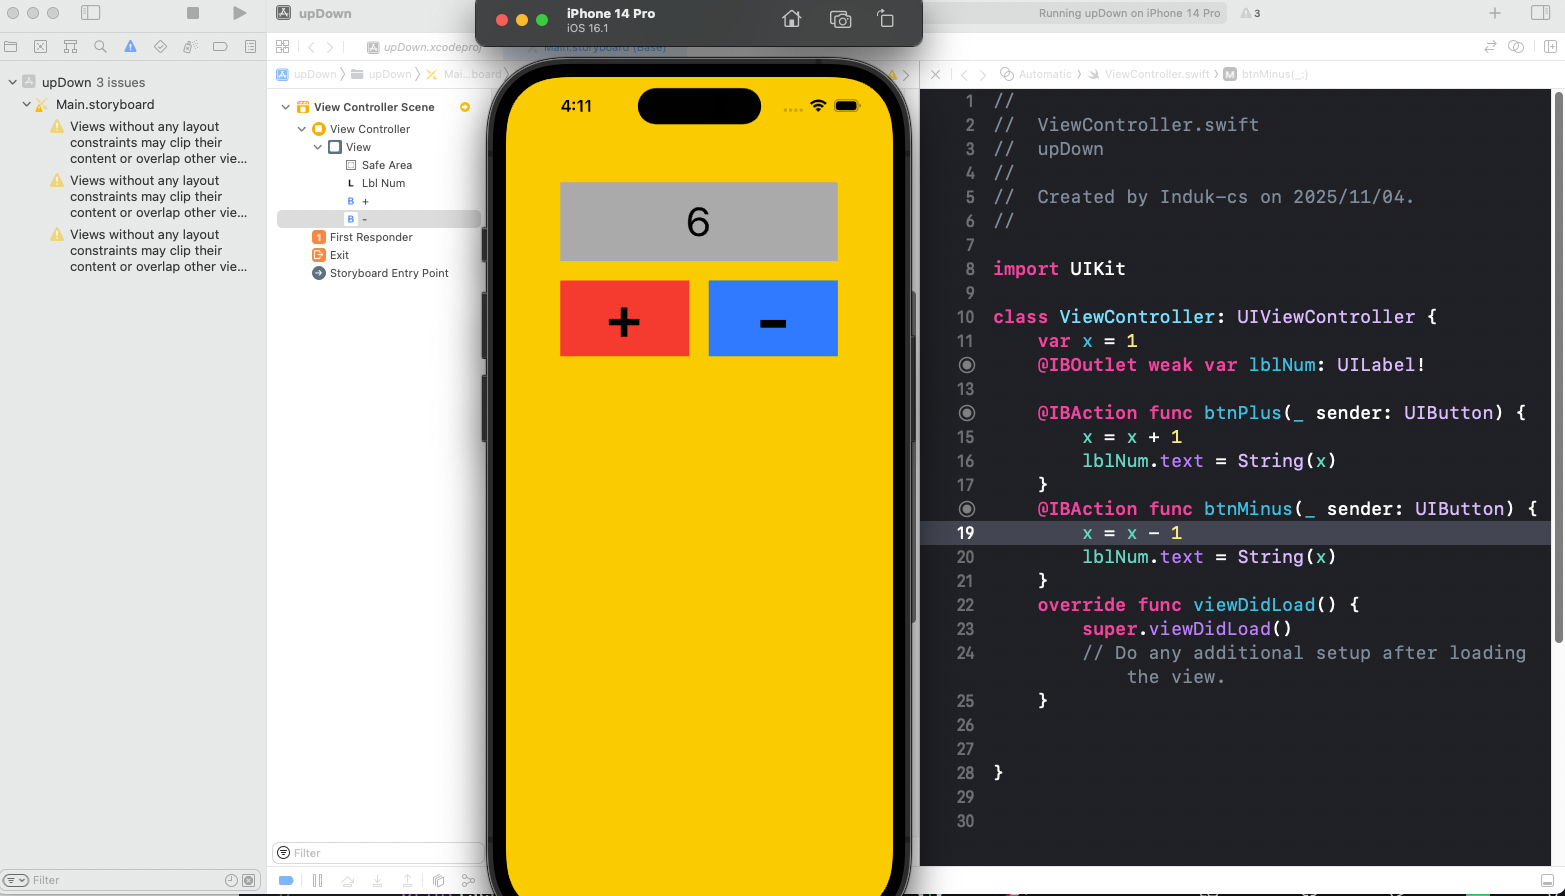
버튼은 아웃렛과 액션 두가지로 생성 가능
Do it! 스위프트로 아이폰 앱 만들기 입문 [ 개정8판 ] Do it! 스위프트로 아이폰 앱 만들기 입문 새창이동송호정, 이범근 저 이지스퍼블리싱 2025년 03월 아래 사이트의 소스는 Xcode 버전 문제가 있어서 첨부 파일로 실습
----------------------------------------
02 Hello World 앱 만들며 Xcode에 완벽 적응하기
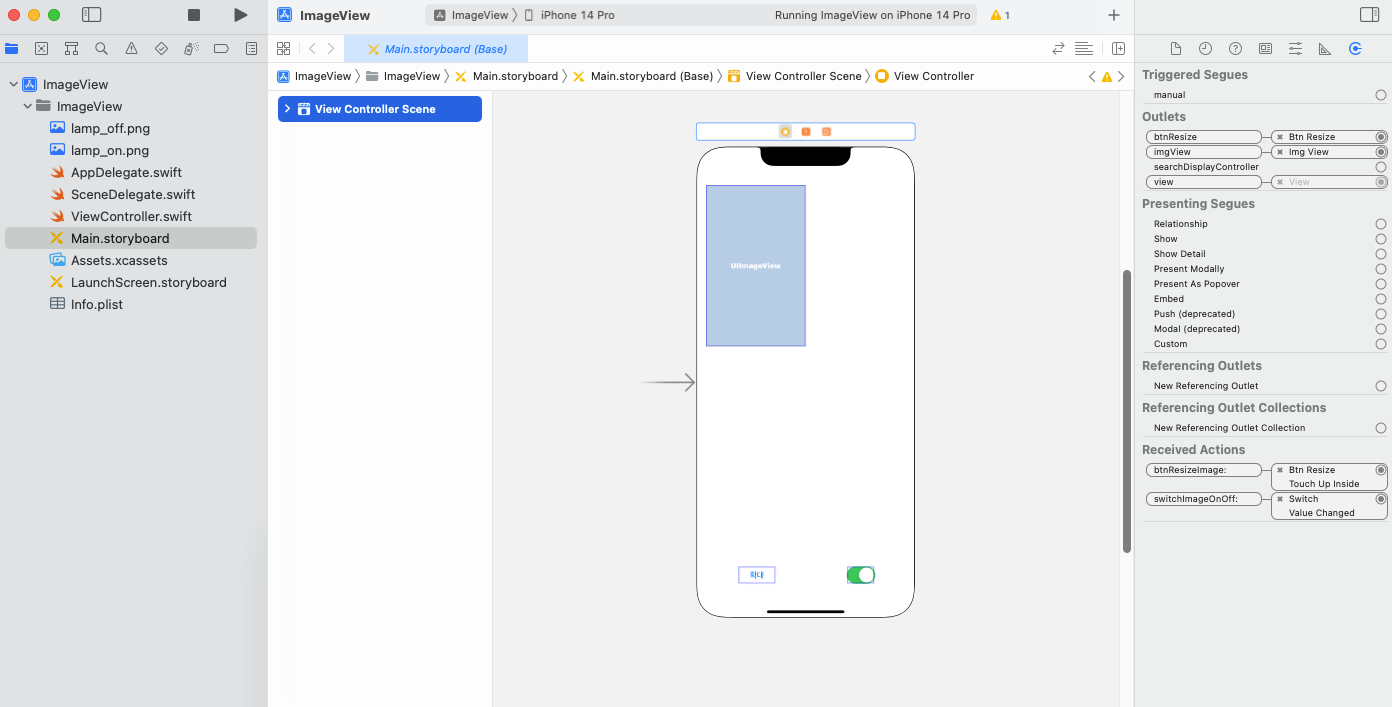
03 원하는 이미지 화면에 출력하기 - 이미지 뷰
//
//  ViewController.swift
//  ImageView
//
//  Created by Ho-Jeong Song on 2021/11/23.
//

// UIKit 프레임워크를 가져옴 — iOS의 UI 구성 요소(버튼, 이미지뷰 등)를 사용할 수 있게 함
import UIKit

// ViewController 클래스 선언 — UIViewController를 상속받아 화면(뷰)을 제어하는 역할을 함
class ViewController: UIViewController {

    // 이미지 확대 여부를 저장하는 불리언 변수 (기본값: false)
    var isZoom = false

    // 전구가 켜진 이미지 객체를 저장할 변수
    var imgOn: UIImage?

    // 전구가 꺼진 이미지 객체를 저장할 변수
    var imgOff: UIImage?

    // 스토리보드에서 연결된 이미지뷰 아웃렛 — 전구 이미지를 표시
    @IBOutlet var imgView: UIImageView!

    // 스토리보드에서 연결된 버튼 아웃렛 — 이미지 크기를 조절하는 버튼
    @IBOutlet var btnResize: UIButton!

    // 뷰가 메모리에 로드된 후 호출되는 메서드 (초기 설정용)
    override func viewDidLoad() {
        super.viewDidLoad()
        // 기본 설정 수행

        // "lamp_on.png" 파일을 불러와 imgOn 변수에 저장
        imgOn = UIImage(named: "lamp_on.png")

        // "lamp_off.png" 파일을 불러와 imgOff 변수에 저장
        imgOff = UIImage(named: "lamp_off.png")

        // 앱 실행 시 기본 이미지를 '켜진 전구' 상태로 설정
        imgView.image = imgOn
    }

    // '확대/축소' 버튼이 눌렸을 때 호출되는 액션 메서드
    @IBAction func btnResizeImage(_ sender: UIButton) {
        // 이미지 크기를 조절할 배율값 (2배)
        let scale: CGFloat = 2.0

        // 새로운 너비와 높이를 담을 변수 선언
        var newWidth: CGFloat, newHeight: CGFloat

        // isZoom이 true일 때 → 현재 확대된 상태이므로 축소 실행
        if (isZoom) {   // true
            // 현재 이미지 크기를 1/2로 줄임
            newWidth = imgView.frame.width / scale
            newHeight = imgView.frame.height / scale

            // 버튼의 제목을 "확대"로 변경 (다음 동작 안내)
            btnResize.setTitle("확대", for: .normal)
        }
        // isZoom이 false일 때 → 현재 축소된 상태이므로 확대 실행
        else {  // false
            // 현재 이미지 크기를 2배로 확대
            newWidth = imgView.frame.width * scale
            newHeight = imgView.frame.height * scale

            // 버튼의 제목을 "축소"로 변경 (다음 동작 안내)
            btnResize.setTitle("축소", for: .normal)
        }

        // 계산된 크기로 이미지뷰의 크기를 변경
        imgView.frame.size = CGSize(width: newWidth, height: newHeight)

        // 확대/축소 상태를 반전시킴 (다음 버튼 클릭 시 반대 동작 수행)
        isZoom = !isZoom
    }

    // 스위치가 on/off 될 때 호출되는 액션 메서드
    @IBAction func switchImageOnOff(_ sender: UISwitch) {
        // 스위치가 ON일 때 → 전구 켜짐 이미지 표시
        if sender.isOn {
            imgView.image = imgOn
        }
        // 스위치가 OFF일 때 → 전구 꺼짐 이미지 표시
        else {
            imgView.image = imgOff
        }
    }
}
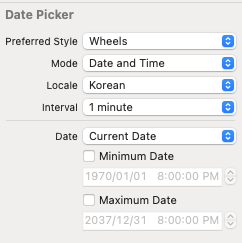
04 데이트 피커 사용해 날짜 선택하기
05 피커 뷰 사용해 원하는 항목 선택하기
class ViewController: UIViewController, UIPickerViewDelegate, UIPickerViewDataSource 뒤 2개는 프로토콜
06 얼럿 사용해 경고 표시하기
//
//  ViewController.swift
//  Alert
//
//  Created by BeomGeun Lee on
//

// UIKit 프레임워크를 불러옴 — 버튼, 이미지뷰, 알림창(Alert) 등을 사용하기 위해 필요
import UIKit

// ViewController 클래스 선언 — UIViewController를 상속받아 화면을 제어
class ViewController: UIViewController {

    // "램프 켜짐" 상태의 이미지 파일을 UIImage 객체로 불러옴
    let imgOn = UIImage(named: "lamp-on.png")

    // "램프 꺼짐" 상태의 이미지 파일을 UIImage 객체로 불러옴
    let imgOff = UIImage(named: "lamp-off.png")

    // "램프 제거" 상태의 이미지 파일을 UIImage 객체로 불러옴
    let imgRemove = UIImage(named: "lamp-remove.png")

    // 현재 램프가 켜져 있는지 여부를 저장하는 불리언 변수 (기본값: true)
    var isLampOn = true

    // 스토리보드에서 연결된 이미지뷰 (램프 이미지를 표시함)
    @IBOutlet var lampImg: UIImageView!

    // 뷰가 메모리에 로드될 때 호출되는 생명주기 메서드 (초기 설정용)
    override func viewDidLoad() {
        super.viewDidLoad()
        // 초기 설정 수행

        // 앱이 실행될 때 기본 이미지를 '켜진 램프'로 설정
        lampImg.image = imgOn
    }

    // "켜기" 버튼이 눌렸을 때 호출되는 액션 메서드
    @IBAction func btnLampOn(_ sender: UIButton) {
        // 이미 램프가 켜져 있는 상태라면 경고창(Alert)을 띄움
        if(isLampOn==true) {
            // AlertController 생성 — 제목(title), 메시지(message), 스타일(alert)
            let lampOnAlert = UIAlertController(
                title: "경고",
                message: "현재 On 상태입니다",
                preferredStyle: UIAlertController.Style.alert
            )

            // AlertAction 생성 — 버튼 제목, 스타일, 실행할 핸들러 (nil이면 단순 닫기)
            let onAction = UIAlertAction(
                title: "네, 알겠습니다.",
                style: UIAlertAction.Style.default,
                handler: nil
            )

            // AlertController에 버튼(액션) 추가
            lampOnAlert.addAction(onAction)

            // AlertController를 화면에 표시
            present(lampOnAlert, animated: true, completion: nil)
        }
        // 램프가 꺼져 있다면 → 이미지를 켜진 상태로 변경
        else {
            lampImg.image = imgOn
            isLampOn = true
        }
    }

    // "끄기" 버튼이 눌렸을 때 호출되는 액션 메서드
    @IBAction func btnLanpOff(_ sender: UIButton) {
        // 현재 램프가 켜져 있을 때만 동작하도록 조건 설정
        if isLampOn {
            // AlertController 생성 — 램프를 끌지 물어보는 경고창
            let lampOffAlert = UIAlertController(
                title: "램프 끄기",
                message: "램프를 끄시겠습니까?",
                preferredStyle: UIAlertController.Style.alert
            )

            // "네" 버튼 액션 — 선택 시 램프 이미지를 꺼진 상태로 바꾸고 상태 변경
            let offAction = UIAlertAction(
                title: "네",
                style: UIAlertAction.Style.default,
                handler: { ACTION in
                    self.lampImg.image = self.imgOff
                    self.isLampOn = false
                }
            )

            // "아니오" 버튼 액션 — 아무 일도 하지 않고 닫기
            let cancelAction = UIAlertAction(
                title: "아니오",
                style: UIAlertAction.Style.default,
                handler: nil
            )

            // Alert에 두 가지 버튼 추가
            lampOffAlert.addAction(offAction)
            lampOffAlert.addAction(cancelAction)

            // Alert를 화면에 표시
            present(lampOffAlert, animated: true, completion: nil)
        }
    }

    // "제거" 버튼이 눌렸을 때 호출되는 액션 메서드
    @IBAction func btnLampRemove(_ sender: UIButton) {
        // AlertController 생성 — 램프를 제거할지 묻는 경고창
        let lampRemoveAlert = UIAlertController(
            title: "램프 제거",
            message: "램프를 제거하시겠습니까?",
            preferredStyle: UIAlertController.Style.alert
        )

        // 첫 번째 버튼: "아니오, 끕니다(off)." — 이미지를 꺼진 상태로 변경
        let offAction = UIAlertAction(
            title: "아니오, 끕니다(off).",
            style: UIAlertAction.Style.default,
            handler: { ACTION in
                self.lampImg.image = self.imgOff
                self.isLampOn = false
            }
        )

        // 두 번째 버튼: "아니오, 켭니다(on)." — 이미지를 켜진 상태로 변경
        let onAction = UIAlertAction(
            title: "아니오, 켭니다(on).",
            style: UIAlertAction.Style.default
        ) { ACTION in
            self.lampImg.image = self.imgOn
            self.isLampOn = true
        }

        // 세 번째 버튼: "네, 제거합니다." — 이미지를 제거 상태로 변경 (붉은색 경고 스타일)
        let removeAction = UIAlertAction(
            title: "네, 제거합니다.",
            style: UIAlertAction.Style.destructive,
            handler: { ACTION in
                self.lampImg.image = self.imgRemove
                self.isLampOn = false
            }
        )

        // AlertController에 세 가지 버튼 추가
        lampRemoveAlert.addAction(offAction)
        lampRemoveAlert.addAction(onAction)
        lampRemoveAlert.addAction(removeAction)

        // Alert를 화면에 표시
        present(lampRemoveAlert, animated: true, completion: nil)
    }

}
07 웹 뷰로 간단한 웹 브라우저 만들기
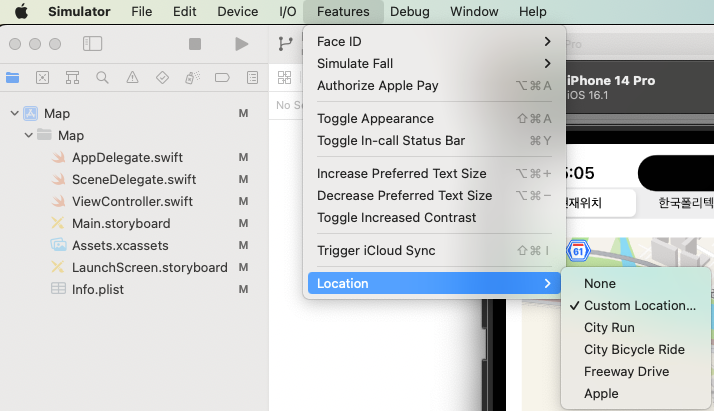
08 맵 뷰로 지도 나타내기
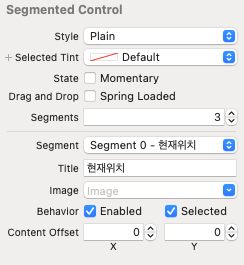
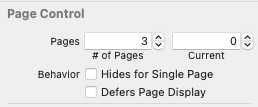
09 페이지 이동하기 - 페이지 컨트롤
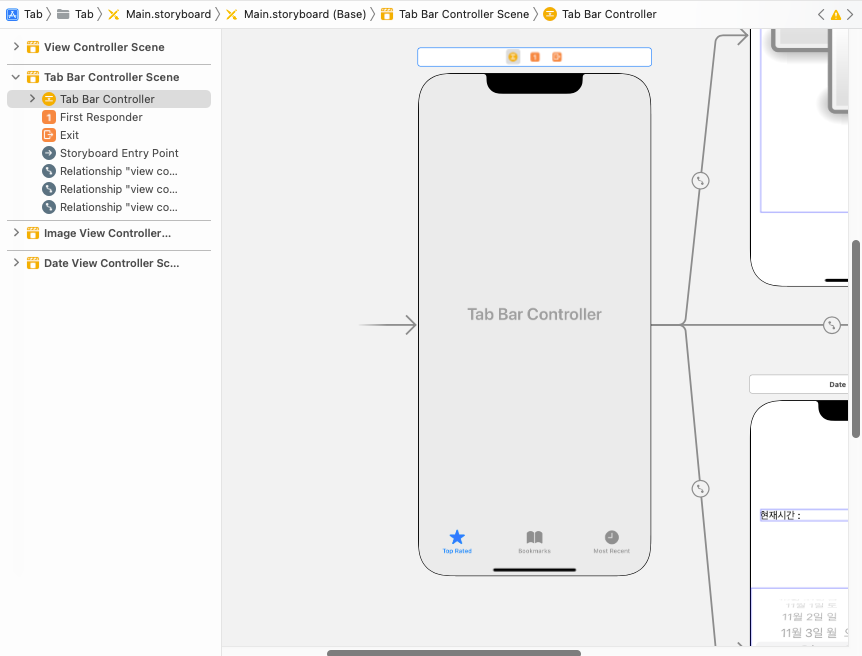
10 탭 바 컨트롤러 이용해 여러 개의 뷰 넣기
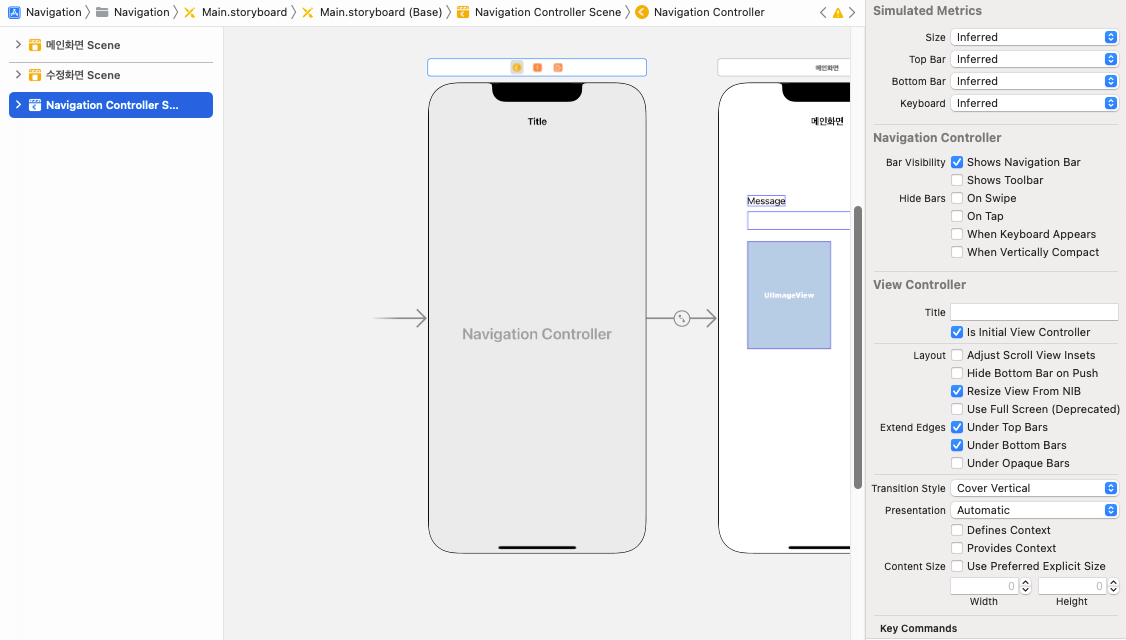
11 내비게이션 컨트롤러 이용해 화면 전환하기
12 테이블 뷰 컨트롤러 이용해 할 일 목록 만들기
13 음악 재생하고 녹음하기
14 비디오 재생 앱 만들기
import UIKit
import AVKit
import AVFoundation

final class ViewController: UIViewController {

    override func viewDidLoad() {
        super.viewDidLoad()
    }

    // 내부 저장된 mp4 파일 재생
    @IBAction func playInternalMovie(_ sender: UIButton) {
        guard let filePath = Bundle.main.path(forResource: "FastTyping", ofType: "mp4") else {
            print("⚠️ 내부 영상 파일을 찾을 수 없습니다.")
            return
        }

        let fileURL = URL(fileURLWithPath: filePath)
        playVideo(from: fileURL)
    }

    // 외부 URL(mp4) 영상 재생
    @IBAction func playExternalMovie(_ sender: UIButton) {
        guard let url = URL(string: "https://dl.dropboxusercontent.com/s/e38auz050w2mvud/Fireworks.mp4") else {
            print("⚠️ 잘못된 영상 URL입니다.")
            return
        }

        playVideo(from: url)
    }

    // 공통 재생 함수
    private func playVideo(from url: URL) {
        let player = AVPlayer(url: url)
        let playerController = AVPlayerViewController()
        playerController.player = player

        present(playerController, animated: true) {
            player.play()
        }
    }
}
15 카메라와 포토 라이브러리에서 미디어 가져오기
16 코어 그래픽스로 화면에 그림 그리기
17 탭과 터치 사용해 스케치 앱 만들기
//
//  ViewController.swift
//  Sketch
//
//  Created by Ho-Jeong Song on 2021/12/01.
//

// UIKit 프레임워크 불러오기 — UIImageView, UITextField, UIViewController 등을 사용하기 위해 필요
import UIKit

// ViewController 클래스 선언 — UIViewController를 상속받아 화면을 제어
class ViewController: UIViewController {

    // 스토리보드에서 연결된 UIImageView — 그림이 그려지는 캔버스 역할
    @IBOutlet var imgView: UIImageView!

    // 스토리보드에서 연결된 UITextField — 선 굵기를 입력받는 필드
    @IBOutlet var txtLineSize: UITextField!

    // 마지막으로 터치한 지점을 저장하는 변수 (다음 선의 시작점으로 사용)
    var lastPoint: CGPoint!

    // 선의 기본 두께 (CGFloat 타입, 기본값 2.0)
    var lineSize: CGFloat = 2.0

    // 선의 기본 색상 (빨강, UIColor를 CGColor로 변환)
    var lineColor = UIColor.red.cgColor

    // 뷰가 처음 메모리에 로드될 때 호출되는 메서드
    override func viewDidLoad() {
        super.viewDidLoad()
        // 추가 설정 수행

        // 앱 실행 시 텍스트 필드에 현재 선 굵기를 표시
        txtLineSize.text = String(Int(lineSize))
    }

    // "Clear" 버튼을 눌렀을 때 — 그림 전체를 지움
    @IBAction func btnClearImageView(_ sender: UIButton) {
        imgView.image = nil
    }

    // 손가락으로 터치를 시작했을 때 호출됨 (그림 시작점 설정)
    override func touchesBegan(_ touches: Set<UITouch>, with event: UIEvent?) {
        // 현재 터치 이벤트 중 첫 번째 터치를 가져옴
        let touch = touches.first! as UITouch

        // 터치한 위치를 imgView 기준 좌표로 저장
        lastPoint = touch.location(in: imgView)
    }

    // 손가락을 움직일 때마다 호출됨 — 실제 그림이 그려지는 부분
    override func touchesMoved(_ touches: Set<UITouch>, with event: UIEvent?) {
        // 이미지 컨텍스트(그림 그릴 공간) 시작
        UIGraphicsBeginImageContext(imgView.frame.size)

        // 현재 그래픽 컨텍스트(그림판)에 선 색상 지정
        UIGraphicsGetCurrentContext()?.setStrokeColor(lineColor)

        // 선 끝 모양을 둥글게 지정
        UIGraphicsGetCurrentContext()?.setLineCap(CGLineCap.round)

        // 선 두께 지정
        UIGraphicsGetCurrentContext()?.setLineWidth(lineSize)

        // 현재 터치 지점 가져오기
        let touch = touches.first! as UITouch
        let currPoint = touch.location(in: imgView)

        // 기존 이미지를 새로운 컨텍스트에 다시 그림 (기존 선 유지)
        imgView.image?.draw(in: CGRect(
            x: 0, y: 0,
            width: imgView.frame.size.width,
            height: imgView.frame.size.height)
        )

        // 선의 시작점 → 마지막 터치 위치
        UIGraphicsGetCurrentContext()?.move(to: CGPoint(x: lastPoint.x, y: lastPoint.y))

        // 선의 끝점 → 현재 터치 위치
        UIGraphicsGetCurrentContext()?.addLine(to: CGPoint(x: currPoint.x, y: currPoint.y))

        // 선을 그림 (stroke = 윤곽선)
        UIGraphicsGetCurrentContext()?.strokePath()

        // 새로 그린 이미지를 UIImage로 받아서 imgView에 표시
        imgView.image = UIGraphicsGetImageFromCurrentImageContext()

        // 그림 작업 종료 (메모리 해제)
        UIGraphicsEndImageContext()

        // 현재 터치 지점을 다음 선의 시작점으로 저장
        lastPoint = currPoint
    }

    // 손가락을 화면에서 뗐을 때 호출됨 — 마지막 점 처리
    override func touchesEnded(_ touches: Set<UITouch>, with event: UIEvent?) {
        // 새 그래픽 컨텍스트 생성
        UIGraphicsBeginImageContext(imgView.frame.size)

        // 선 색상, 모양, 두께 설정
        UIGraphicsGetCurrentContext()?.setStrokeColor(lineColor)
        UIGraphicsGetCurrentContext()?.setLineCap(CGLineCap.round)
        UIGraphicsGetCurrentContext()?.setLineWidth(lineSize)

        // 기존 이미지를 유지하면서 새로 그림
        imgView.image?.draw(in: CGRect(
            x: 0, y: 0,
            width: imgView.frame.size.width,
            height: imgView.frame.size.height)
        )

        // 마지막 점에서 같은 점으로 선을 그림 (점 하나 표시 효과)
        UIGraphicsGetCurrentContext()?.move(to: CGPoint(x: lastPoint.x, y: lastPoint.y))
        UIGraphicsGetCurrentContext()?.addLine(to: CGPoint(x: lastPoint.x, y: lastPoint.y))
        UIGraphicsGetCurrentContext()?.strokePath()

        // 결과 이미지를 imgView에 반영
        imgView.image = UIGraphicsGetImageFromCurrentImageContext()

        // 컨텍스트 종료
        UIGraphicsEndImageContext()
    }

    // 아이폰을 흔들었을 때 호출됨 (Shake 제스처 감지)
    override func motionEnded(_ motion: UIEvent.EventSubtype, with event: UIEvent?) {
        // 흔들기 동작이면 그림 전체 삭제
        if motion == .motionShake {
            imgView.image = nil
        }
    }

    // 선 굵기 입력창에서 값이 바뀔 때 호출됨
    @IBAction func txtEditChange(_ sender: UITextField) {
        // 빈 문자열이 아닐 경우만 실행
        if txtLineSize.text != "" {
            // 텍스트를 숫자로 변환하여 lineSize에 반영
            lineSize = CGFloat(Int(txtLineSize.text!)!)
        }
    }

    // 키보드에서 리턴(엔터) 키를 눌렀을 때 호출됨
    @IBAction func txtDidEndOnExit(_ sender: UITextField) {
        // 텍스트를 숫자로 변환하여 선 굵기 갱신
        lineSize = CGFloat(Int(txtLineSize.text!)!)
    }

    // 텍스트 필드를 터치했을 때 호출됨
    @IBAction func txtTouchDown(_ sender: UITextField) {
        // 입력창의 모든 텍스트를 선택 상태로 만듦 (기존 숫자 빠르게 변경 가능)
        txtLineSize.selectAll(UITextField.self)
    }

    // 선 색상을 검정으로 변경하는 버튼
    @IBAction func btnChangeLineColorBlack(_ sender: UIButton) {
        lineColor = UIColor.black.cgColor
    }

    // 선 색상을 빨강으로 변경하는 버튼
    @IBAction func btnChangeLineColorRed(_ sender: UIButton) {
        lineColor = UIColor.red.cgColor
    }

    // 선 색상을 초록으로 변경하는 버튼
    @IBAction func btnChangeLineColorGreen(_ sender: UIButton) {
        lineColor = UIColor.green.cgColor
    }

    // 선 색상을 파랑으로 변경하는 버튼
    @IBAction func btnChangeLineColorBlue(_ sender: UIButton) {
        lineColor = UIColor.blue.cgColor
    }
}
18 스와이프 제스처 사용하기
19 핀치 제스처 사용해 사진을 확대/축소하기